Clear plastic injection molding service is a specialized manufacturing process used to create high-quality, transparent plastic parts for industries such as automotive, medical, lighting, and consumer goods. This process allows for optical clarity, dimensional accuracy, and structural integrity, making it essential for products where aesthetics and precision are non-negotiable. Struggling with bubbles or yellowing in transparent plastic parts? In this guide, we’ll show you how to achieve glass-like clarity using clear plastic injection molding—without expensive trial and error.
What is Clear Plastic Injection Molding?
Clear plastic injection molding refers to injecting molten transparent plastic materials—such as polycarbonate (PC) or acrylic (PMMA)—into a high-precision mold to produce visually clear and structurally sound parts. These parts must meet strict clarity and performance standards, often under challenging conditions.
Key Benefits:
- High optical clarity
- Tight tolerances and consistency
- Aesthetic appeal and polish
- Ideal for lenses, covers, light guides, medical devices, and more
Clear Plastic Molding Material Choices: A Comparative Analysis
Choosing the right material is crucial for achieving transparency and functional performance. Below is a quick comparison of commonly used materials in clear plastic molding:
1. Acrylic (PMMA)
- Clarity: 93% light transmission
- Pros: UV resistance, high polishability
- Cons: Brittle, limited impact resistance
- Applications: Displays, light diffusers, outdoor signage
2. Polycarbonate (PC)
- Clarity: 88-90%
- Pros: High impact strength, durability
- Cons: Less scratch-resistant than PMMA
- Applications: Safety shields, lighting components, auto interiors
3. Optical Liquid Silicone Rubber (OLSR)
- Clarity: Up to 94%
- Pros: Flexible, non-yellowing over time
- Applications: LED lenses, medical wearables, optical seals
4. Polyetherimide (PEI)
- Clarity: about 82%
- Pros: Heat and chemical resistance
- Applications: Aerospace, sterilizable medical tools
Tip: Always align your material choice with end-use requirements such as impact resistance, UV exposure, and environmental conditions.
Design Tips for Transparent Injection Molding Parts
To ensure crystal-clear parts, good design is non-negotiable. Here are design considerations specifically for clear plastic injection molding:
- Uniform Wall Thickness – Prevents warping and optical distortion
- Rounded Corners – Minimizes stress concentration and air traps
- Draft Angles – Eases demolding and reduces surface defects
- Smooth Mold Finish – Mirror-polished mold surfaces enhance clarity
- Controlled Cooling – Slower, uniform cooling reduces cloudiness
- Material Drying – Essential to eliminate bubbles or fogginess
Tip: Even the most transparent resin will turn cloudy if moisture isn’t fully removed before molding.
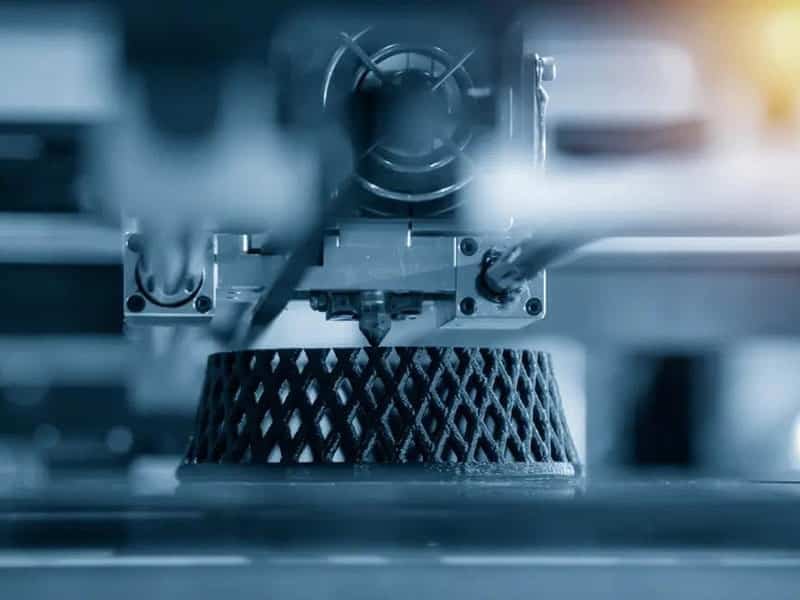
The Injection Molding Process for Transparent Plastic Parts
Each step of the injection molding process must be carefully optimized to avoid defects and preserve transparency:
1. Material Preparation
- Drying to eliminate moisture
- Hopper feeding in a controlled, contamination-free environment
2. Melting & Injection
- Precise temperature control avoids degradation
- High injection pressure and proper gate design help avoid weld lines
3. Cooling & Ejection
- Gradual cooling prevents internal stress
- Gentle ejection avoids scratches on clear surfaces
4. Post-Processing
- Finishing, like trimming, polishing, or UV coating, enhances clarity and durability
How to Avoid Fog, Bubbles, and Yellowing of Transparent Injection Parts?
Clear polypropylene injection molding, used to produce transparent plastic parts, faces unique challenges such as streaking, bubbles, and discoloration. These issues can compromise the appearance of molded parts, especially when clarity is a priority. Here are common problems and their solutions:
1. Streaking and Surface Imperfections
Streaking occurs when visible lines appear on the surface, often due to uneven cooling or material contamination. This is particularly noticeable in clear injection-molded parts.
Solution: Ensure uniform cooling with well-designed systems, and use pure materials to avoid contamination. This helps achieve a smooth, clear surface.

2. Bubbles and Air Traps
Air bubbles trapped in the material can distort transparency, creating unwanted visible marks.
Solution: Control injection speed and pressure carefully, and use vacuum-assisted molding to remove trapped air. Moisture control is also key to preventing steam-induced bubbles.

3. Discoloration and Yellowing
Excessive heat, improper material handling, or low-quality resins can cause yellowing, reducing the clarity of the molded parts.
Solution: Keep processing temperatures within the optimal range, use UV-resistant resins, and ensure proper material storage to avoid degradation and discoloration.

4. Poor Flow and Fill Issues
Inconsistent material flow can lead to defects such as short shots or weld lines, impacting the clarity of the part.
Solution: Optimize mold and gate design, adjust injection pressure and speed, and monitor the resin’s temperature to ensure consistent filling and smooth flow.

How Mold Design and Equipment Impact Clarity
- Mold Surface Finish: Use mirror-polished cavities to prevent haze
- Vent Design: Proper venting reduces air traps
- High-Precision Machines: Ensure tight control over speed, pressure, and temperature
- Hot Runners vs Cold Runners: Hot runners are often better for clear parts due to uniform flow
Quality Control in Clear Plastic Molding
Maintaining high clarity isn’t just about molding—consistent quality control is essential.
- Use visual inspection under lighting to detect haze, streaks, or scratches
- Perform material traceability and drying checks
- Conduct sample testing for clarity, impact, and UV resistance
- Implement tool maintenance routines to avoid surface defects
Final Thoughts: Why Clear Injection Molding Demands Expert Control
Clear plastic injection molding is more than just another molding job. It is a precision process that demands material purity, accurate mold design, strict temperature control, and expertise in handling transparent materials.
Whether you are producing optical lenses, medical housings, or consumer lighting components, mastering this process is essential for delivering flawless results. By leveraging production on demand capabilities, manufacturers can ensure high-quality, clear plastic parts with faster turnaround and greater flexibility to meet diverse market needs.