
Developing a new product involves more than creating a design and moving directly to manufacturing. Before mass production, the team needs to verify the product’s appearance, structure, materials, functions, and assembly before mass production. Without proper testing, design problems may only be discovered after tooling or production has started, increasing development costs and delays.
The stages of prototyping provide a structured way to evaluate a product as its design develops. Each stage has a different purpose, from checking a basic concept to validating production processes. By choosing the right prototype and manufacturing method at each stage, companies can reduce development risks and prepare products for manufacturing.
Why Are the Stages of Prototyping Important?
The purpose of prototyping stages is not to make every prototype look like the final product. It is to perform the right validation at each development stage.
- Reduce Development Risks: Early prototypes help identify design, structural, and functional problems before they affect later development.
- Control Costs: Simple prototypes can be used to test basic ideas without investing in expensive materials or molds too early.
- Improve Design Accuracy: Physical samples allow engineers to check dimensions, assembly, and performance that may not be fully confirmed through CAD models.
- Prepare for Manufacturing: Later prototypes help verify materials, tolerances, tooling, and production processes before mass production.
The 5 Stages of Prototyping
There are five common stages of prototyping. Each stage requires a different level of detail and validation.
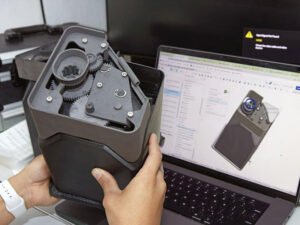
Stage 1: Proof of Concept Prototype
A proof of concept prototype checks whether the basic product idea or key technology is feasible.
At this stage, engineers focus on the core working principle rather than appearance, surface finish, or final dimensions. The prototype may use simple structures, standard components, or alternative materials to test a specific function.
Common methods include FDM 3D printing, basic CNC machining, and manual assembly. These methods allow teams to test ideas quickly without significant tooling investment.
Stage 2: Visual or Appearance Prototype
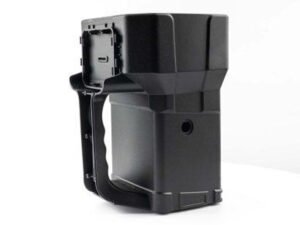
An appearance prototype is used to evaluate the product’s external design. It helps designers check shape, size, proportions, color, and surface finish.
This stage is useful for design reviews, customer presentations, and ergonomic evaluations. However, the prototype may not have complete internal structures or working functions.
Common manufacturing methods include SLA 3D printing, CNC machining, urethane casting, and surface finishing processes such as painting. The selected method depends on the required appearance and dimensional accuracy.
Stage 3: Technical or Alpha Prototype
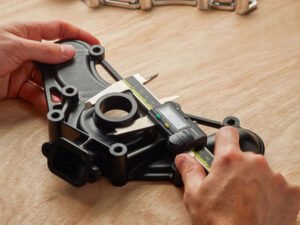
The Alpha prototype focuses on engineering design and basic technical performance. It is used to check whether the product structure and main components work as intended.
Typical evaluations include:
- Part dimensions and tolerances
- Component fit and assembly
- Structural strength and stability
- Basic mechanical or electrical functions
- Potential manufacturing difficulties
Materials may be closer to the final product specification than those used in earlier prototypes. Common methods include CNC machining, SLS or MJF 3D printing, and prototype assembly.
A design for manufacturing (DFM) review is also useful at this stage. It helps identify structural features that may increase tooling complexity or cause molding problems.
Stage 4: Functional or Beta Prototype
A functional prototype, also known as a Beta prototype, is designed to evaluate the product’s performance under conditions closer to actual use.
Compared with an Alpha prototype, it should more closely represent the final product in terms of materials, structure, and functions. Testing may include durability, environmental resistance, assembly, and operational performance.
Common manufacturing methods include CNC machining, SLS or MJF 3D printing, urethane casting, and low-volume injection molding.
The choice depends on the required material properties and test conditions. For example, if a plastic component needs to be evaluated for mechanical strength or assembly fit, the prototype material should provide sufficiently representative properties.
Stage 5: Pre-Production Prototype
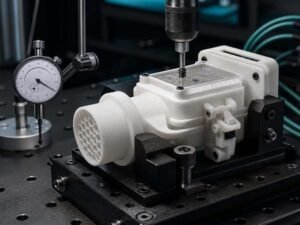
The pre-production prototype is used to confirm that the product can be manufactured consistently using the planned production process.
Unlike earlier prototypes, this stage should use the final or production-equivalent materials and manufacturing methods whenever possible.
Key validation activities include:
- Checking dimensions and tolerances against drawings
- Evaluating appearance and surface quality
- Confirming assembly fit and product function
- Testing mold performance and process stability
- Reviewing inspection standards and production consistency
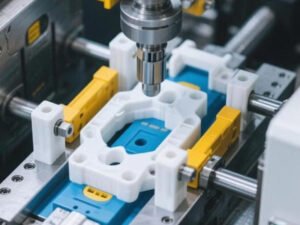
For plastic parts, prototype injection molding, bridge tooling, and low-volume injection molding may be used. CNC machining may still be suitable for components that do not require molding.
Once the design and production process meet the agreed requirements, the project can move toward mass production.
How to Choose the Right Prototyping Method?
The correct method depends on the question the prototype needs to answer. Early rapid prototyping stages should prioritize speed, iteration, and low unit cost. Later stages should prioritize material accuracy, dimensional control, surface quality, and production repeatability.
| Development stage | Primary objective | Suitable methods | Typical fidelity |
|---|---|---|---|
| Proof of concept | Confirm technical feasibility | FDM, SLS, CNC, standard parts | Low to medium |
| Visual prototype | Evaluate appearance and ergonomics | SLA, PolyJet, CNC, vacuum casting | Medium to high |
| Alpha prototype | Test function, fit, and materials | CNC, SLS, MJF, urethane casting | Medium to high |
| Beta prototype | Validate reliability and user experience | CNC, urethane casting, bridge molding | High |
| Pre-production | Validate tooling and production process | Prototype mold, bridge tool, injection molding | Production-level |
A single project may use several methods. For example, a team may use 3D printing for an early mechanism test, CNC machining for tolerance-critical components, urethane casting for a limited number of appearance samples, and prototype injection molding before production tooling.
Key Considerations When Planning the Prototyping Process
Prototype Costs at Different Stages
Prototype costs depend on material, part size, design complexity, accuracy, quantity, and testing requirements. Early prototypes are generally less expensive because they use simpler structures and faster manufacturing methods. Later stages may require production-grade materials, specialized tooling, and more extensive testing.
Can You Skip Any Prototyping Stages?
Not every project needs five completely separate prototype stages. Simple products with mature designs may combine appearance and technical validation. Some projects may also reduce testing when earlier results already cover specific requirements.
However, critical functional, safety, and production validation should not be skipped simply to reduce costs.
Common Prototyping Mistakes
- Starting with a high-fidelity appearance model before confirming the basic function or assembly concept.
- Treating a 3D-printed prototype as equivalent to an injection-molded production part without accounting for material, shrinkage, and process differences.
- Delaying DFM review until after tooling has started.
- Skipping functional testing because the visual model looks correct.
- Moving to production tooling before confirming material behavior, tolerances, and assembly requirements.
Conclusion
The stages of prototyping provide a practical framework for developing custom plastic products with lower risk and better production outcomes. Jiangzhi provides custom plastic and rubber prototyping services, including 3D printing, CNC machining, mold design, and injection molding. Contact us with your drawings and project requirements to discuss prototype development and production solutions.


