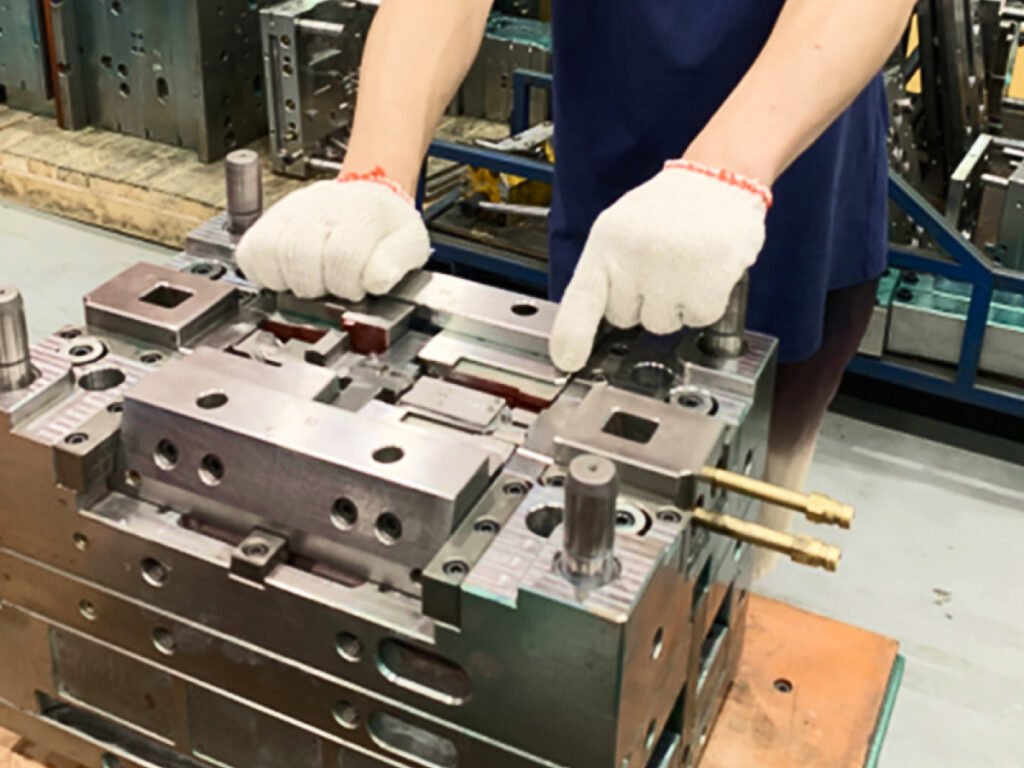
Injection molds can accumulate resin residue, mold release agents, oil, and other deposits after repeated production cycles. These contaminants may cause discoloration, surface defects, inconsistent demolding, and reduced production efficiency. However, using the wrong cleaning method can also damage polished cavities, surface textures, or protective coatings.
Why Injection Mold Cleaning is Critical for Manufacturing?
Injection molds represent a substantial capital investment. Maintaining pristine core and cavity surfaces, ejector systems, and venting channels directly affects both part output quality and the overall lifespan of the tool.
Failing to clean injection molds at regular intervals leads to several operational problems:
- Product Discoloration and Burn Marks: Trapped gas and carbonized polymer particles bleed into fresh melt, causing cosmetic streaks, dark spots, and surface discoloration.
- Contamination Transfer: Residual lubricants or degraded resins transfer onto molded parts, causing paint adhesion failures, structural weak points, or chemical contamination in medical and food-grade applications.
- Demolding Anomalies: Deposit build-up on cavity walls increases surface friction, leading to part sticking, ejector pin marks, surface scoring, or part deformation during ejection.
- Escalated Tooling Maintenance Costs: Corrosive outgassing compounds left uncleaned slowly pit and etch steel mold surfaces, necessitating expensive re-polishing or re-machining.
Technical Note: While surface defects such as short shots, burns, or flash are often linked to dirty tooling, they can also stem from improper barrel temperature settings, incorrect injection pressure, inadequate mechanical venting, or resin moisture content. Diagnostic checks should isolate process parameters before attributing defects solely to mold cleanliness.
Types of Residues Accumulating on Injection Molds
Identifying the contaminant type is the first step in selecting the right mold-cleaning chemical and method.
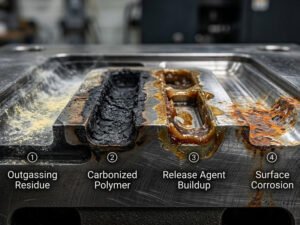
Residues generally fall into four primary categories:
- Polymer and Resin Degradation: High-temperature processing of engineering resins (such as PVC, ABS, PC, and POM) produces thermal decomposition products that stick to core and cavity surfaces.
- Carbon and Gas Vent Deposits: During injection, displaced air and volatile polymer gases exit through micro-vents (typically 0.015 mm to 0.03 mm deep). Over time, outgassed volatiles condense into hard carbon deposits that clog vents, preventing gas escape and burning parts.
- Mold Release Agents and Lubricants: Repeated application of silicone or non-silicone sprays leaves a sticky film on mold surfaces that traps airborne dust, shop debris, and resin fines.
- Coolant Residues and Shop Oils: Hydraulic fluids, guide pin grease, and mineral deposits from internal cooling channels can leak onto parting lines and molding cavities.
What Is the Best Method for Cleaning Injection Molds?
There is no single method suitable for every mold. The best choice depends on the residue type, mold geometry, surface finish, coating, and material compatibility.
Manual Cleaning with Approved Cleaners
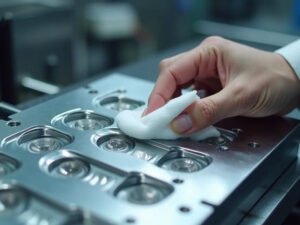
Manual cleaning is suitable for accessible surfaces and localized contamination. Operators apply an approved cleaner and use lint-free cloths or soft brushes to remove residue.
This method requires relatively little equipment and allows careful control around precision features. However, it can be labor-intensive and may produce inconsistent results when cleaning complex cavities.
Ultrasonic Cleaning
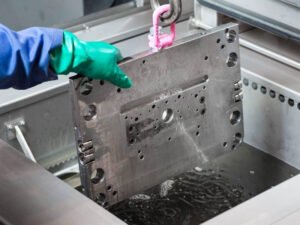
Ultrasonic cleaning uses high-frequency sound waves to generate cavitation in a cleaning liquid. Disassembled mold plates are submerged in a heated aqueous tank containing specialized cleaning chemistry. High-frequency sound waves generate microscopic cavitation bubbles that implode against steel surfaces, stripping carbonized residues from complex geometries, deep ribs, and small ejector pin holes without abrasive wear.
Automated Parts-Washing Systems
Automated systems use controlled washing cycles to clean compatible mold components. They can improve repeatability for production environments that require frequent cleaning.
Before selecting a system, consider component size, cleaning chemistry, rinsing requirements, drying performance, and the ability to protect precision surfaces.
Specialized Chemical Cleaning
Solvent-based or water-based cleaners may be used to remove oils, release agents, and specific resin deposits. The cleaner must be compatible with the mold steel, surface treatment, coatings, seals, and nearby components.
Follow the product instructions for concentration, contact time, temperature, ventilation, and rinsing. Test compatibility before applying a new cleaner to the entire mold.
Dry Ice Blasting
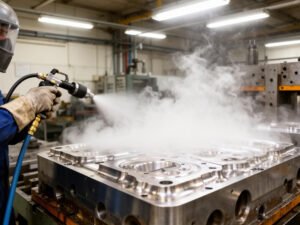
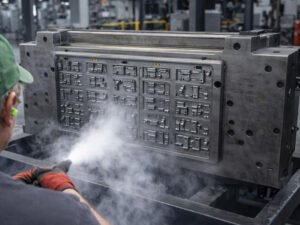
Dry ice blasting propels solid carbon dioxide CO2 pellets via compressed air against mold surfaces. Thermal shock freezes contaminants, causing them to crack and detach, while the kinetic force sweeps deposits away. Because dry ice sublimes into gas upon impact, it leaves no secondary waste and can clean injection molds directly inside the press while hot.
Step-by-Step Injection Mold Cleaning Guide
Following a structured protocol ensures thorough cleaning while protecting precision mold surfaces from accidental damage.
Step 1: Stop Production and Prepare the Mold
Follow the machine shutdown and energy-isolation procedures required at the facility. Allow the mold to reach a safe handling temperature and follow the instructions before removing or disassembling it.
Wear appropriate personal protective equipment. When using chemical cleaners, ensure adequate ventilation and review the product’s safety instructions.
Step 2: Inspect the Mold and Identify the Residue
Inspect accessible areas, including the cavity, core, parting line, gates, vents, and ejector components.
Determine whether the contamination consists of resin, carbonized deposits, oil, release agent, rust, or foreign particles. Record any existing scratches, corrosion, or coating damage so that these conditions are not mistaken for cleaning problems.
Step 3: Select and Test the Cleaning Method
Choose a cleaning agent and tool based on the contaminant and mold construction. Check compatibility with polished surfaces, textured areas, coatings, inserts, and seals.
When introducing a new cleaner or procedure, test it on a small, inconspicuous area when appropriate. Follow the specified contact time, temperature, concentration, and rinsing requirements.
Step 4: Remove Residue Without Damaging the Surface
Start with the least aggressive method that can remove the contamination. Use lint-free cloths, soft brushes, or approved non-abrasive tools.
For stubborn deposits, repeat the approved cleaning process rather than applying excessive force. Avoid steel wool, hard metal scrapers, and uncontrolled abrasive polishing on precision or mirror-finished surfaces. These tools can change surface roughness, damage coatings, or affect part release.
Severe carbonized deposits may require a specialized process. If ordinary cleaning is ineffective, consult the mold maintenance team or cleaning supplier before escalating to a more aggressive method.
Step 5: Clean Vents and Hard-to-Reach Areas
Pay attention to narrow vents, corners, grooves, parting lines, and other locations where deposits can accumulate. Use appropriately sized tools that will not alter the feature dimensions.
Do not enlarge vents or damage shut-off surfaces while removing residue. Hot runner components and internal passages may require dedicated procedures based on the equipment manufacturer’s recommendations.
Step 6: Remove Cleaner Residue and Dry the Mold
Rinse the mold only when required by the cleaner’s instructions and when the components are compatible with the rinsing process. Remove residual cleaning chemicals using the specified procedure.
Dry the mold completely, including recesses, threaded areas, and other locations where moisture may remain. Apply suitable corrosion protection when required for storage or extended shutdowns.
Step 7: Inspect and Verify Before Production
Inspect the cleaned surfaces for remaining deposits, scratches, corrosion, and other changes. Confirm that relevant vents, moving components, and passages are clean.
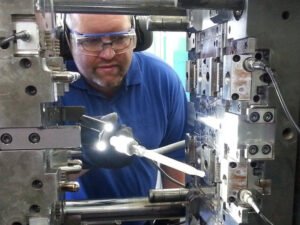
Reassemble the mold according to the requirements and verify component installation and lubrication where applicable. Before returning to normal production, inspect initial molded parts for discoloration, contamination, surface defects, and demolding performance.
Common Injection Mold Cleaning Mistakes to Avoid
Improper cleaning techniques can permanently ruin mold cavity polishes, alter critical dimensions, and lead to premature tooling failure. Avoid these common practices:
- Using Abrasive Tools on Polished Cavities: Never use steel wire brushes, emery cloth, sandpaper, or steel files on polished or textured mold surfaces. Hardened abrasive tools create microscopic scratches that cause part sticking and visible cosmetic defects.
- Failing to Verify Chemical Compatibility: Aggressive solvents can attack specialized mold coatings (such as titanium nitride, diamond-like carbon, or nickel plating), rubber O-rings, and aluminum mold components. Always check chemical compatibility before application.
- Scraping Too Aggressively: Applying heavy downward force with scrapers on shut-off land areas or parting lines can round sharp edges, leading to part flash during injection.
- Leaving Residual Cleaners or Moisture: Allowing solvent residues or condensation to sit on mold surfaces causes flash rust, steel etching, and localized pitting during storage.
- Ignoring Vents and Hard-to-Reach Areas: Wiping down cavity surfaces while neglecting micro-vents, cooling lines, and ejector pin sleeves leads to immediate gas trapping and burning upon restarting production.
How Often Should Injection Molds Be Cleaned?
There is no universal cleaning interval for all injection molds. The frequency should be based on material behavior, production conditions, contamination trends, and inspection results.
Important factors include:
- Material Type: Some resins and additives produce more deposits under certain processing conditions.
- Production Cycles: Longer production runs may allow more residue to accumulate before the next inspection.
- Mold Release Agent Use: Frequent or excessive application may increase residue buildup.
- Mold Geometry: Narrow vents, textured surfaces, and complex cavities may require closer monitoring.
- Quality Inspection Results: Increasing black specks, stains, or demolding problems may indicate a need for inspection and cleaning.
Routine Cleaning vs. Deep Cleaning
Routine cleaning removes visible or localized residue during planned maintenance or production changeovers. Deep cleaning is more extensive and may involve removing components or using specialized equipment.
The required interval should be established from production history and actual mold condition. Avoid unnecessary disassembly or aggressive deep cleaning when a less intensive method is sufficient.
Increasing contamination, recurring surface defects, visible deposits near vents, or a change in demolding performance should trigger an inspection. If cleaning does not resolve the problem, investigate the molding process and mold condition.
Conclusion
Disciplined injection mold cleaning protocols protect tooling investments, maintain tight part tolerances, and reduce unplanned downtime.
At Flexiparts, we support clients with comprehensive custom plastic injection molding, precision tool design, mold building, and lifecycle maintenance services. Whether you require new tool manufacturing, Design for Manufacturability (DFM) evaluations, or production optimization, contact our engineering team to review your project requirements and receive a competitive quotation.
FAQ About Mold Cleaning