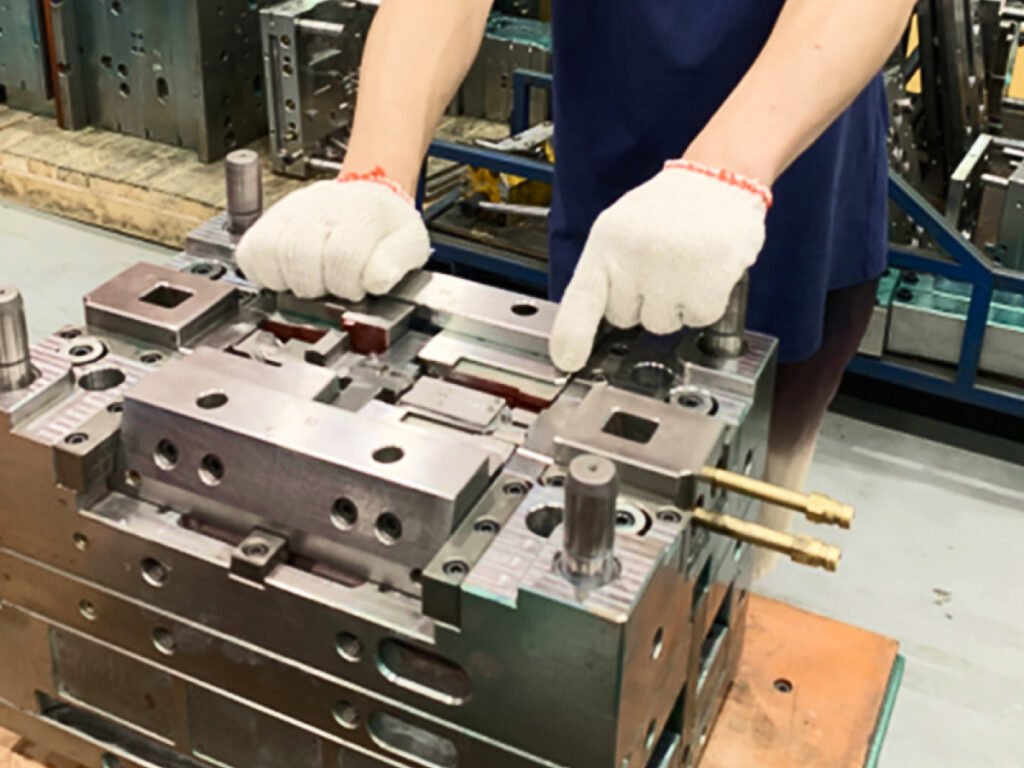
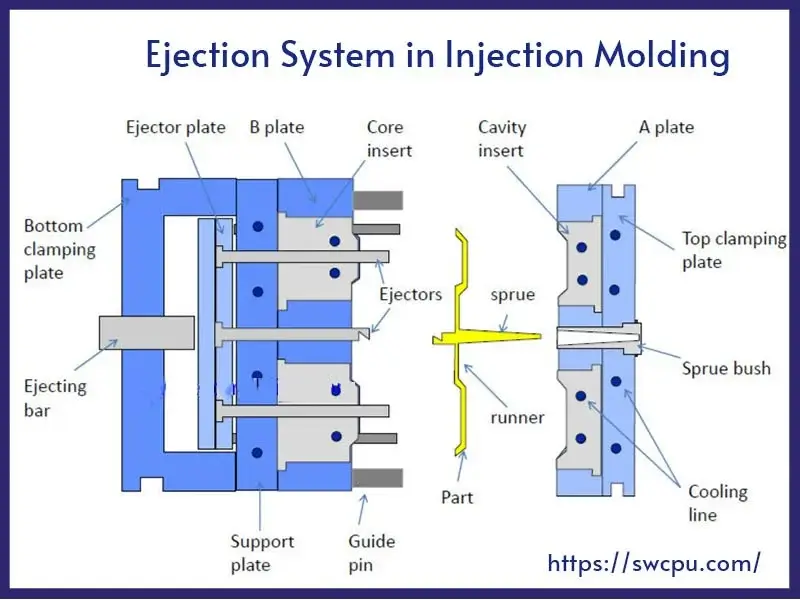
Mold polishing affects more than how a molded part looks. The finish on the cavity also influences how easily the part ejects, how long the mold lasts, and whether production stays stable and cost-effective once volumes rise.
Polishing is also not limited to hand work and diamond mirror finishing. The mold industry uses six main methods. Each suits a different situation, and choosing among them is a trade-off between cost, lead time, and part quality. This article describes each method in turn, including where it fits best, lists what to check before polishing starts, and covers the defects to watch for.
Six Mold Polishing Methods
These six are categories used in the trade, not strictly separate processes. Each method below is described by how it works, the surface it produces, where it fits best, its limits, and its effect on cost.
1. Manual Polishing
Manual polishing uses abrasive stones, sandpaper, polishing sticks, and other manual tools to remove machining marks, scratches, and surface irregularities. The process typically starts with coarse abrasives and gradually moves to finer grades to achieve the required surface finish. The operator adjusts tool pressure, direction, and abrasive grade according to the mold geometry and surface condition. This allows precise control over material removal in areas that are difficult to reach with machines.
Applicable Mold Structures
Manual polishing is suitable for injection molds with complex cavities, narrow grooves, sharp edges, and small precision features. It is also useful for local finishing where machine tools cannot reach or where material removal must be carefully controlled.
Achievable Surface Finish
Depending on the abrasive sequence, mold steel, and operator skill, manual polishing can produce matte, semi-gloss, high-gloss, or mirror finishes. It is particularly useful when specific features require different levels of polishing.
Limitations
Hand polishing is labor-intensive and depends heavily on technician experience. Uneven pressure can cause inconsistent finishes. It also carries a risk of both over-polishing and missed areas.
Cost Impact
Equipment cost is low, but labor cost is high and rises with surface area and finish level. The main hidden cost is rework caused by inconsistent results.
2. Abrasive Grinding and Polishing
Abrasive grinding and polishing remove surface irregularities through controlled friction between the mold surface and abrasive materials. Common tools include grinding stones, sandpaper, abrasive wheels, and polishing compounds. The process follows a sequence from coarse to fine abrasives. Each stage removes the marks left by the previous stage.
Applicable Mold Structures
This method is widely used for open, accessible surfaces, basic polishing of cavities and cores, removing CNC and EDM marks, and preparing batches of molds before a finer finish.
Achievable Surface Finish
Abrasive grinding and polishing can produce matte, smooth, and semi-gloss surfaces. With the correct abrasive sequence and adequate surface preparation, it can also prepare a mold for high-gloss or mirror finishing.
Limitations
Efficiency is low at fine mirror grades, abrasives need regular maintenance, and it is difficult to polish deep inside complex cavities.
Cost Impact
Basic abrasive tools are relatively inexpensive. Semi-automatic equipment can reduce labor time on suitable surfaces. However, finer finishes require more processing stages, abrasive materials, and inspection time.
3. Electrolytic Polishing
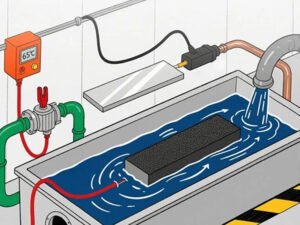
Electropolishing is an electrochemical process. The mold is the anode in an electrolyte bath with a cathode, powered by a DC supply. When current is applied, a thin layer of metal dissolves from the surface, and the raised microscopic peaks dissolve preferentially, which levels the surface.
The process is usually described in two stages: leveling at the larger scale, then brightening at the fine scale. The mold must be pre-ground to an even finish first.
Applicable Mold Structures
Electropolishing may be suitable for compatible metal mold components with complex geometries, large surface areas, or regions that are difficult to reach using conventional polishing tools.
Achievable Surface Finish
Electropolishing can reduce surface roughness and produce a bright, uniform surface across large areas and complex cavities, with no mechanical marks. The amount of material removed can be controlled closely.
Limitations
Equipment investment is high, and trained operators are needed. Poorly managed parameters lead to over-polishing and dimensional change.
Cost Impact
Equipment investment, electrolyte management, process control, and waste treatment increase costs. Electropolishing may be economical for compatible components processed in batches, but it is not necessarily the best option for every mold.
4. Diamond Polishing
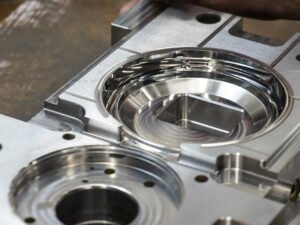
Diamond polishing uses polishing compounds containing diamond abrasives to remove extremely small amounts of material from the mold surface. Several abrasive grades are typically used, progressing from coarser compounds to finer ones. The surface must be cleaned between stages to prevent larger abrasive particles from causing new scratches. Diamond polishing is generally performed after the mold surface has been prepared through machining and earlier polishing stages.
Applicable Mold Structures
Diamond polishing is commonly used for optical lens molds, cosmetic parts with a high appearance requirement, and any mold where a mirror finish is specified.
Achievable Surface Finish
It gives the highest gloss of the six methods, and a well-done diamond finish is consistent from shot to shot.
Limitations
Diamond consumables are expensive, and the method needs a high-quality surface from the earlier stages because defects left there remain visible under a mirror finish. It is also slow.
Cost Impact
Cost rises sharply with the finish grade, through consumable cost and polisher hours.
5. Ultrasonic Polishing
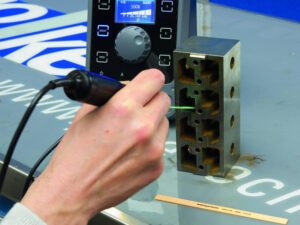
Ultrasonic mold polishing uses a tool that vibrates at high frequency while applying abrasive stones, compounds, or slurry to the mold surface. The vibration assists the abrasive action, allowing small amounts of material to be removed through repeated contact.
Tool shape and abrasive selection can be adjusted for different cavity features. Ultrasonic polishing is often used alongside conventional polishing rather than replacing it.
Applicable Mold Structures
Ultrasonic polishing is particularly useful for narrow deep slots, special-shaped curves, complex cavities, and small features that are hard to reach by hand.
Achievable Surface Finish
It gives a fine, even finish in confined areas, with less effort from the polisher than hand work.
Limitations
It is not suited to mold polishing flat faces with strict flatness requirements because localized abrasive action can disturb the flatness. For a mirror finish, it is usually followed by manual or diamond work.
Cost Impact
Equipment cost is moderate, and the savings are in labor on features that are slow to polish by hand. The savings apply to those areas, not to the whole mold.
Chemical Polishing
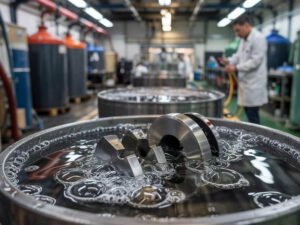
Chemical polishing uses a formulated chemical solution to dissolve microscopic irregularities on a metal surface. The workpiece is exposed to the solution under controlled conditions, allowing selected surface areas to dissolve and become smoother.
Unlike electropolishing, chemical mold polishing does not require an externally applied electric current. However, the solution chemistry, temperature, exposure time, and surface condition must be carefully controlled.
Applicable Mold Structures
Chemical mold polishing may be suitable for selected metal components with irregular shapes, complex cavities, or surfaces that are difficult to reach with conventional abrasive tools. Its applicability depends strongly on the metal alloy and chemical compatibility.
Achievable Surface Finish
Chemical mold polishing can reduce surface roughness and improve brightness on suitable materials.
Limitations
Material suitability is narrow. The chemicals are corrosive, and control is difficult. Uneven chemical attack can cause pitting, discoloration, or nonuniform finishes. The process may also affect critical dimensions if material removal is not controlled.
Cost Impact
Capital cost is low, but cost shifts to solution management, safety measures, waste disposal, and rework when etching comes out uneven.
What to Check Before Polishing?
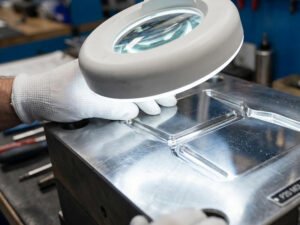
A short checklist before polishing begins prevents most rework.
Protect and Mark
- Mark features to protect. Use a marker on sealing (shut-off) faces, sharp edges, and radii that must be kept. Mark any areas to be textured, with the texture type and depth. The marks should be clear and hard to wipe off.
- Mask precision features. Tape over precision features and dimensional datum faces so abrasives do not scratch or knock them.
- Count and number inserts. List every insert and component to be polished and number them, to prevent loss or mix-ups.
Confirm Requirements
- Confirm the surface grade. Settle the grade the customer requires and the roughness the part actually needs for ejection and appearance. A mirror finish where it is not needed can cause sticking and wastes cost.
- Confirm steel and hardness. Polishing practice differs by steel, so confirm the steel grade and heat-treated hardness, and whether runners and vents also need polishing.
- Get it in writing. Record all polishing requirements, grades, and delivery standards in writing, not verbally, to avoid disputes later.
Confirm Mold Condition
- Finish fitting first. All sealing faces and mold fitting should be complete before polishing. If polishing comes first, assembly scratches the finished surface and forces rework.
- Check machining history. After EDM, an acid test confirms the state of the surface. Parts with high residual stress after heat treatment should be stress-relieved first. Both issues cause pits and pinholes in a mirror finish if left alone.
- Leave enough polishing allowance. Too little causes corners and features to be rounded and dimensions to go out of tolerance. Too much adds polishing hours.
- Clean the mold. Blow chips and oil out of cavities and inserts, since dirt scratches the surface during polishing.
Common Mold Polishing Defects and How to Prevent Them?
Over-Polishing
Cause: too much material removed, which pushes the mold out of tolerance, rounds sharp edges, and ruins sealing faces.
Prevention: control the amount removed, measure the mold regularly during polishing, and protect sealing faces and feature surfaces from excess grinding.
Pitting and Pinholes
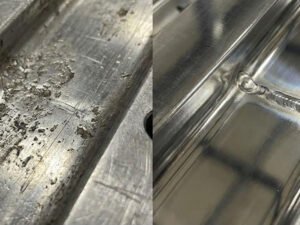
Cause: poor-quality steel with inclusions, residual stress from heat treatment that was not relieved, an EDM surface layer that was not fully removed, or heat burn during polishing.
Prevention: use good steel and check it for flaws in advance, stress-relieve before high-grade mirror polishing, remove enough of the EDM layer, and use coolant to avoid overheating.
Uneven Polishing
Cause: inconsistent technique, uneven pressure, abrasives replaced too late so some have worn out, or complex cavities not fully reached.
Prevention: set one polishing standard, replace abrasives on schedule, give complex cavities and corners their own dedicated pass, and inspect the whole surface afterward so patches can be re-polished.
Roughness Out of Specification
Cause: wrong grit choice, missing stages, or too little time at a stage so that marks from the previous one remain.
Prevention: plan a complete sequence from the target roughness backward, follow it, and give each stage enough time to fully remove the previous stage’s marks.
Pitting on Stainless Steel
Cause: with stainless grades such as 420, friction from rotating tools generates too much heat and the surface pits.
Prevention: use a finer stone grit before polishing than would be used on steels such as H13, lower the rotation speed to reduce frictional heat, and use coolant.
Part Sticking in the Mold
Cause: the surface is polished too smooth, especially in deep cavities with little draft.
Prevention: choose the finish grade by the ejection requirement, do not specify a mirror finish unless it is needed, and add a fine texture in areas that stick to help release.
Conclusion
Conclusion
The right mold polishing method depends on the requirements of the custom plastic parts being produced. Resin type, part geometry, surface finish, mold steel, production volume, and project budget all influence the level of polishing required.
For custom injection molded parts, polishing requirements should be considered during mold design and manufacturing to achieve the desired surface appearance, ensure consistent part quality, and avoid unnecessary finishing costs.
If you are developing custom plastic components, send us your part drawings, resin specifications, and surface finish requirements. Our team can review your project and recommend a suitable mold polishing level based on the part’s functional and appearance requirements.