Screw assembly looks simple on the surface and gets complicated fast once material behavior, production volume, and disassembly frequency enter the picture. A well-designed screw assembly holds a product together reliably for years. This guide covers how screw assembly is actually designed, from screw selection to boss geometry to torque, along with the mistakes that most often turn a simple fastening decision into a field failure.
What Is Screw Assembly?
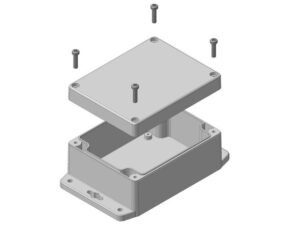
Screw assembly is a mechanical fastening process that uses screws to join and secure two or more components. Depending on the application, screw assembly may involve threaded holes, nuts, threaded inserts, or other fastening components.
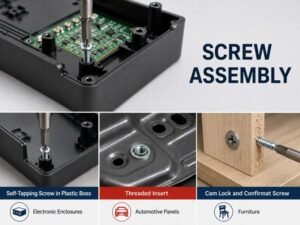
It plays out across industries in different forms: small self-tapping screws into plastic bosses for electronic enclosures, threaded inserts for automotive panels needing repeated service access, cam locks and confirmat screws for furniture.
Types of Screws Used When Assembling
Screw selection isn’t really about picking from a catalog. It’s about matching the screw’s mechanism to what the receiving material and the assembly process can support.
Self-Tapping Screws
Self-tapping screws form or cut their own threads directly into the boss as they’re driven in. They’re the default choice for plastic housings and thin sheet metal because they eliminate the need for a separate tapping or insert step. The tradeoff is that the threads they create are only as strong as the surrounding boss material, and each removal weakens them slightly. If your product is meant to be opened once during its life (say, for warranty service), self-tapping screws into a well-sized boss are usually enough. If it needs to be opened repeatedly, they start to be a liability.
Machine Screws with Threaded Inserts
Machine screws with threaded inserts solve the repeated disassembly problem. The insert, whether heat set, press fit, or molded in, creates a durable metal thread inside the plastic part, so the screw engages metal rather than plastic every time. This is the right call for battery compartments, service panels, or anything a technician or end user is expected to open more than a couple of times. The added cost is the insert itself and, in the case of heat set inserts, an extra installation step.
Thread Forming Versus Thread Cutting
Thread forming versus thread cutting is a distinction worth knowing at the design stage even if it feels like a manufacturing detail. Thread forming screws displace material outward without removing it, which works well in ductile plastics like ABS or nylon. Thread cutting screws actually remove material with a cutting edge, which suits harder or more brittle materials but leaves cuttings that need somewhere to go, usually a small chip cavity built into the boss. Choosing the wrong one for your material is a common cause of cracked bosses during assembly.
The practical question to ask during screw selection is simple: how many times will this joint be assembled and disassembled, and can the base material tolerate direct threading that many times? If the answer is more than two or three cycles, an insert is almost always the safer design choice.
Boss and Hole Design for Screw Assembly
Boss and hole geometry connect directly to screw selection.
Boss wall thickness needs to scale with the screw diameter, not just the overall part wall thickness. Too thin, and the boss splits under the hoop stress created by the screw as it threads in. Too thick, and you introduce sink marks on the visible surface and longer cooling cycles in molding.
Material shrinkage is another factor that catches people off guard, particularly with plastic parts. A boss designed to nominal dimensions in CAD can come out of the mold measurably smaller once the material cools, which shifts the effective fit between screw and hole.
For the full breakdown of boss sizing, hole types, and reinforcement techniques, see our detailed guides on boss design in plastic parts and types of holes in molded parts.
Fastening Process and Torque Design
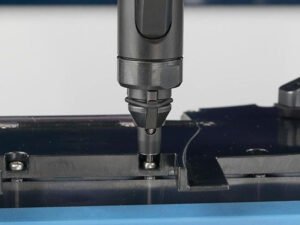
The screw assembly process typically begins by positioning the screw in the pilot hole. The screw is then driven to form or cut the threads and continues tightening as it engages with the threads. Once the screw head reaches the part surface or a designed shoulder, tightening stops at the required seating point.
The right torque range comes from the screw’s thread engagement length, the material’s yield strength, and how much clamp force the joint actually needs to stay closed under load or vibration. Too little torque and the joint backs out over time. Too much and you strip the threads or crack the boss right at assembly.
It’s also worth designing differently depending on whether the joint will be fastened by hand or by an automated driver. Automated fastening generally needs tighter positional tolerance on the boss and hole, since the driver has less ability to correct for misalignment than a person would. Manual assembly is more forgiving on tolerance but more variable on applied torque, which is where a well-designed seating shoulder helps most.
How to Choose the Right Screw Assembly Approach
Pulling the earlier sections together, a few questions tend to drive the actual decision on any given joint.
1. How Often Will the Joint Be Opened?
One time or never favors self-tapping screws directly into a well-sized boss. Repeated access favors threaded inserts.
2. What’s the Base Material?
Soft, ductile plastics tolerate thread-forming screws well. Harder or more brittle materials, including some filled plastics and cast metals, often need thread-cutting screws or inserts to avoid cracking.
3. What Torque and Standards Apply?
Reference torque specs from the screw manufacturer as a starting point, and where the product needs to meet a recognized standard (ISO or DIN thread and torque specifications are common references), build that into the boss and screw selection early rather than retrofitting it later.
4. Is the Joint Hand Assembled or Automated?
This shapes tolerance requirements on the boss and hole as much as it shapes the fastening spec itself.
5. What Does the Joint Need to Survive?
Vibration, thermal cycling, and repeated load all argue for anti-loosening features, whether that’s a locking thread, a washer, or simply a more generous boss with better rib support.
None of these questions has a universally right answer. They’re tradeoffs between cost, assembly speed, and long-term reliability, and the right balance depends on what the product actually needs to do.
Conclusion
Good screw assembly design comes down to how early the screw type, boss geometry, and fastening method get considered together. A boss sized without knowing the torque spec, or a screw chosen without knowing how many times the joint needs to open, tends to surface as a problem after tooling is already cut.
At Jiangzhi, we provide assembly manufacturing services for custom components that require reliable screw fastening and other assembly processes. If you need support with a custom part assembly, feel free to contact our team.